Saturday, April 14, 2012

Hand Painted Stars and Stripes Pants DIY


Customize your own rock n' roll inspired jeans with easy stars and stripes! I created this project while I was designing costumes for my new favorite Minnesota band 'Glitter Gun'.  Band leader Kaity Heart approached me with some great ideas for their band costumes and I decided to make hand painted stripe pants for lead guitarist Dan Star. They turned out so great we decided to do a second pair with stars!

Supplies:
-jeans
-fabric paint- I like Jaquard brand textile paints
-flat paint brush
-pencil
-star stencil or plastic star template
-masking tape
-ruler


I mixed black paint with a metallic silver to create a gun metal color which will look great under the stage lights and goes well with the whole theme of glitter for their costumes. For the star shapes I used plastic glow in the dark stars. I traced around them with a pencil and used a small flat paint brush to get a really nice clean lines.


 For the stripe pants I used a regular width masking tape to ensure nice clean even stripes. I started taping at the side seam and used a ruler to space out the next stripes working towards the center of the pants. It gets a little tricky when you get to the pockets, fly, and center back. Just remember to keep the spacing even and the stripes will most likely line up in a chevron in the center back seam.


Use a wide flat paint brush to paint on a thin coat of paint. You don't want to get your paint to thick as it might leak under the tape and you will lose your nice clean line. As you work across your pant legs let the paint dry completely before you turn your pants over to do the backside. When the paint is completely dry you can pull off the tape and reveal your perfect stripes.


Now that you've painted your custom rock n' roll jeans you have to heat set the paint so it doesn't wash out. All you have to do is throw the jeans in a really hot dryer, preferably an industrial one at a laundry mat, for 30 minuets. Now you are ready to boogie in style!


posted by Sarah

Sunday, March 25, 2012

Hand Painting Fabric Using a Stencil DIY

I wanted to share with all of you a great technique for printing a graphic on an existing garment using a stencil. This project is a nightgown I printed a light blue flock of birds on in a diagonal to create the look of an already printed fabric. To have a more organic look you can print your image as randomly as you want. 


Materials:
graphic image
medium weight plastic or velum to make the stencil
exacto knife
fabric paint
sponge or paint brush
iron

Step by step:
1. First, create a graphic that does not have too much fine detail. I chose a graphic representation of a bird in flight. I drew it on a piece of paper and cut it out to make sure the scale was correct. You can also use a pre-made stencil which you can buy at most craft stores.
2. Then I traced my paper image onto a medium weight plastic sheeting and cut it out using an exact knife. You can get plastic at most arts or crafts stores, velum can also work. You want the material to withstand multiple paint applications so avoid using paper or cardboard which will absorb the paint and may distort your image.
3. I then marked on my garment where I wanted to print each bird. I marked the fabric with a straight pin where the center of the stencil will be. You don't have to mark your layout if you want to be spontaneous and make the pattern random. 
4. Now it is time to start printing! Lay out your garment with a piece of paper inside so the paint doesn't' leak through and get on the wrong side of your garment. Lay your stencil where you want your image and hold it flat to the garment and start painting using a sponge or paint brush depending on your preference. The sponge will give a nice 'distressed' look while a paint brush will make a very solid image. I like to use Jaquard fabric paints which are a nice thickness for stenciling. You can also use acrylic paint and add some fabric painting medium so it won't wash out of your fabric. You don't want your paint too watery as it will leak under the stencil and distort your image. Always do a test pint on a scrap piece of fabric before you start printing on your real garment.


5. After you are finished painting one side of the garment let paint dry completely. Flip the garment to the other side keeping the piece of paper inside the garment. Print the other side and let the whole garment dry for 24 hours.
6. Now it is time to heat set the paint so it doesn't wash out. You can either heat set using a hot iron or throwing the garment in a hot dryer for 30 minuets, home dryers are not hot enough so go to a laundry mat. When ironing use a press cloth between the garment and the iron and move iron in small circular movements over each printed image for 10 seconds each. Now you have a custom made hand printed garment! So cute and easy!

I have more fun fabric painting techniques I will post in the next coming weeks so check back for more DIY tutorials!

posted by Sarah


Friday, March 2, 2012

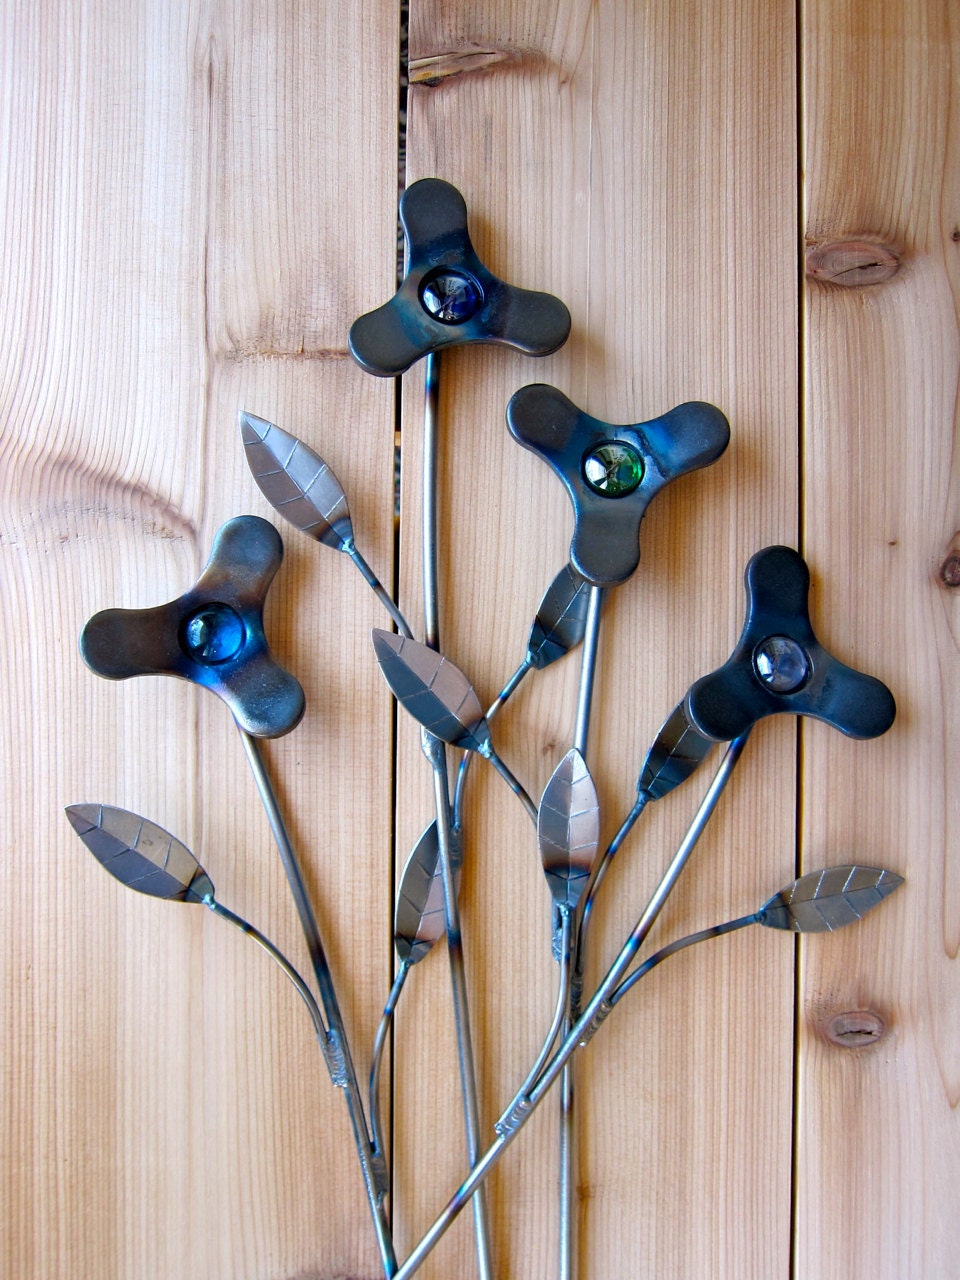
Welded garden art is back + more NEW items!

Our welder is back! Our Dad has been a huge influence on our creative work and our interest in handmade items. Last year we started talking about including a few of his metal creations in our Etsy shop and they were a hit! They flew off our virtual shelves. Inspired, Dad has been on the lookout for new, interesting materials and recently created some amazing new items. And some of the old favorites are back too!

Pretty Pinwheel Flowers for your garden - now available in our Etsy shop!


Although we are [finally] getting our winter snowstorm in Minnesota, we know many of you are thinking about springtime and gardening anyway. Dad's items are great indoors and out. And they make perfect gifts for Mother's Day and Father's Day as well as for weddings and housewarmings!

posted by Christa

Saturday, February 25, 2012

Drop Cloth Suit

I had the great pleasure of collaborating with fellow artist and friend Hugh O'Rourke on a super fun project. Hugh is a painter and sculptor here in NYC, you can view more of his work here. We met during my thesis art exhibit at NYU, as he works at the 80WSE gallery where I exhibited my installation.  He knew my passion for sewing clothing and asked me to collaborate with him in making a suit out of his drop cloths from his studio. The idea of the suit came from famous artist Joseph Beuys' own sculpture Felt Suit.


The most challenging and most creative part of making the suit was laying out the pattern pieces. I had to find interesting areas on the drop cloth to create an interesting pattern effect on the suit. I kept Hugh's own work in mind while selecting which paint glob to use for the lapel or where to use the glued on pieces of newspaper.


I liked imagining what pieces of Hugh's art made the drops, splatters, and smears of paint, glue, and mixed media on the drop cloths.

Spaces Between Studio Show courtesy of Hugh O'Rourke
In the end I think the suit turned out really great! I made the suit to Hugh's measurements but the piece is meant to be hung on the wall as pictured below. Hugh was very excited when I brought the finished suit to him, I cannot wait to see it in one of his gallery shows, or maybe a fun photo shot of him wearing it! This project helped remind me of my interest in the meaning of clothing and the emotional response humans can have to sentimental clothing. This suit is a portrait of a painter, a garment made of the leftovers in the art making process. Anyone need a garment made for them from their own scraps?


posted by Sarah

Sunday, February 5, 2012

Sweet handmade gifts for your sweetheart: Sneak Peek!

We are making fun new Valentine-inspired gifts for our Etsy shop and are excited to share a sneak peek with you!  Maybe you'll find something perfect for your sweetie (or yourself!).

Sarah made the perfect BFF gift. Two pairs of pink & purple heart earrings, one for you to keep and one to give to your BFF! They are super cute and now available on Etsy!
BFF Earrings on Etsy
Sarah also made a pair of heart and chain earrings perfect for your rockstar darling. Sweet -- and edgy!

Sweetheart Pink Heart and Chain Earrings - coming soon on Etsy
Christa has been busy creating new items from materials she has been collecting. Her current project is sweet little magnets made from bottlecaps and greeting cards.

Upcycled Bottlecap Magnets -- in our Etsy shop now!
Check them out, and watch for new designs coming soon.

posted by Christa & Sarah xo!

Wednesday, January 25, 2012

Still Life With Iris is coming to life!

I feel like my life has been consumed by the world of 'Still Life With Iris' and I love it! I am designing the costumes for this magical play being performed at the Yellow Tree Theatre in Osseo, MN. If you are in the chilly state in February you must go see it, it will warm your heart and dazzle your eyes!

STILL LIFE WITH IRIS
February 3rd -26th, every Thursday-Saturday 7:30 and Sundays at 2:00
To Order Tickets Call 763-493-8733
yellowtreetheatre.com

The costumes have been so much fun to design, you can see my costume renderings here. I started by doing a lot of research of images that created the feeling I wanted to convey through the costumes. The director Andy Frye and I met often to look at images and talk about each character. I then did my drawings to refine my vision and be able to start my search for each costume piece. I found a lot of costumes at my parents house (thanks for never throwing anything away!) and a variety of thrift stores in St. Cloud, Hutchinson, Brooklyn, Manhattan, and Paterson, NJ! All of the clothes needed some sort of artistic tweaks or total reconstruction, but I would say 85% of the costumes are recycled, reused, or found materials. I feel really good about keeping my design eco friendly, which also adds to the charm of the clothes. Here is a sneak peek from the fittings I had with the actors...
Iris actress Mary
Leaf Monitor actress Sheila
Memory Mender actor Bruce
Mozart actor Nathan
3rd String actor Ryan
You can also watch a darling video Jason Peterson, artistic director, made of the costumes on Facebook. Thanks for the support and I hope you can see the show!

post by Sarah

Monday, January 2, 2012

New Projects & Products for the New Year!

Happy New Year! We hope you had a wonderful holiday with your loved ones and are enjoying the beginning of 2012!!

We are so happy we were able to donate $36 to the Make a Wish Foundation on behalf of everyone who made a purchase from our Etsy shop this holiday! Congratulations to the winners of our 12 Days of Christmas celebration and thank you for supporting SophiaFredricka, the handmade items on Etsy, and Make a Wish.

image from wish.org


Sarah and I are excited to bring some new ideas and projects to life in 2012 and look forward to unveiling them to you here and on Etsy! A few things in the works already are Sarah's amazing designs for Still Life With Iris at the Yellow Tree Theater in Osseo, MN which opens February 3rd, sweetheart refrigerator magnets by Christa, and beer/wine/coffee/tea cozies by Sarah. Stay tuned for pictures and more previews!

posted by Christa